Wood bead garland is a beautiful decor element that you can add anywhere in your home. Personally I love the beaded garland during the holidays, but I’ve even seen them used as keychains.
The nice thing about this DIY project is that ANYONE can do it. Even my eight year old niece created an adorable garland for her bedroom while we were working on the last craft project.
Aside from the beads, you probably have all the project supplies already in your home. For this craft I used acrylic paint, but next time I think I’m going to try a chalk spray paint to make it go quicker.
The only downside of this craft is that it did take me about 2 hours to paint all the beads (I gave each bead 3 coats of acrylic paint). I found when using a dark color, like red, I needed to go over it multiple times because the wood from the bead was bleeding through.
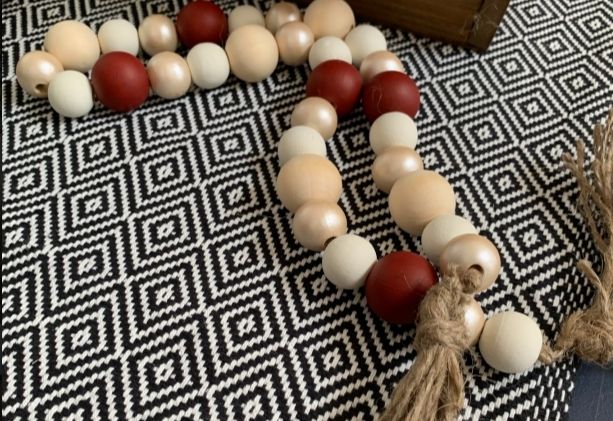
In the wood bead garland I made (pictured above) I used the following acrylic colors. White, red (but I mixed the red with a drop of black paint to get it a deeper color, natural beads, and champagne metallic. I highly recommend adding a metallic paint color to your garland as it gives it such a pretty shimmer.
You can also dilute your acrylic paint with a little bit of water to give it more of a transparent finish. I recommend doing this if you want some of the natural wood to bleed through.
Wood bead garland DIY
I prefer multi-size wooden beads to give the craft more dimension, but you can use the same size and use variations of color instead. (Or do both like I did!)
Amazon sells packages of beads in various sizes so you don’t have to buy multiple packs.
Wood Bead Garland
Ingredients
- 1 package wooden craft beads
- 1 bottle acrylic paint
- 1 roll twine
- 1 metal coat hanger
- 1 paint brush
- 1 decorative ribbon (optional)
Instructions
-
If you are using various sized beads in your wooden garland lay them out on a table to figure out your pattern first.
-
Once you have your pattern it's time to paint your beads.
-
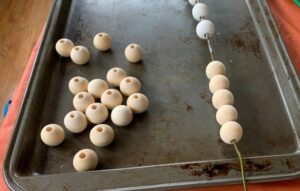
If you are painting your beads with a small paintbrush and acrylic paint I recommend using a coat hanger to string your beads to make it easier to paint. If the beads touch a surface while the paint is wet it will leave marks on the bead and they won't be smooth.
-
Straighten out the coat hanger and then lay it across a raised surface to give yourself space to paint the beads. (We used a cookie sheet with sides)
-
Space the beads evenly on the coat hanger and paint each bead making sure to get all the sides and around the bead opening.
-
Repeat until the beads are evenly painted.

-
Allow beads to dry completely before removing from the coat hanger.
-
String the beads on a piece of twine, remember to make your pattern.
-
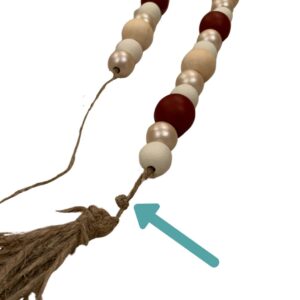
Once the beads are strung, tie a knot at the end of the twine. Make sure there is about a 1/2 inch of space between the beads and the knot in the twine. Don't cut the twine at the knot- keep another 3-4 inches after the knot so you have room to make the tassel.
-
To make the tassel, take your roll of twine and wrap a long strand around your hand or index card at least 10 times. Cut the end of the twine. Using the twine at the end of your bead garland, wrap that around the loop of twine to secure the loop.
-
Secure a knot around the loop then cut the other side of the loop to make the tassel.
-
Wrap the extra twine around the top of the tassel (where it is connected to the wooden bead garland) to finish the tassel.
-
If you want to add decorative ribbon to the tassel, add it after the twine has secured the tassel to the garland.
Bead Garland Tips
Use various sized beads and paints. I used a pattern of small beads (different colors) and then a large bead for my design.
If you are using multiple colors paint each color separately. Then is the beads accidentally touch while drying you won’t have a splotchy wooden bead.
I used a small paperclip to move the beads while I was painting them so I didn’t smudge the paint. I stuck the paperclip in the hole to slowly turn the bead while I painted it.
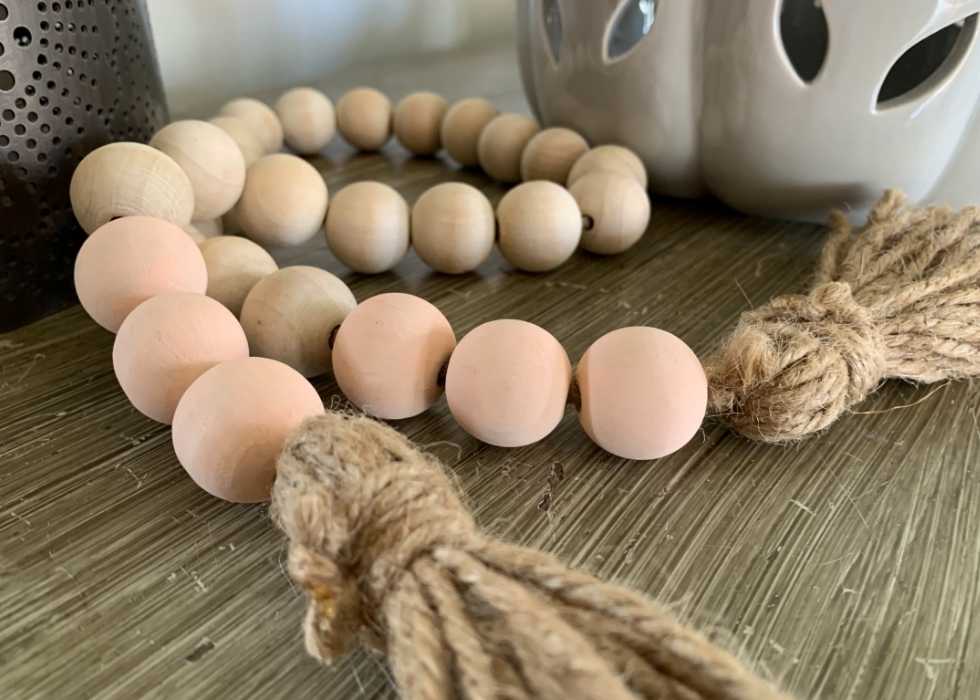
Keep some beads natural in your pattern. It’s less work to paint all of them and the natural wood makes a gorgeous farmhouse style wood bead garland.
Use a piece of tape to keep the end of the twine from fraying while threading your wooden bead garland. This is a life saver as the twine frays very easily.
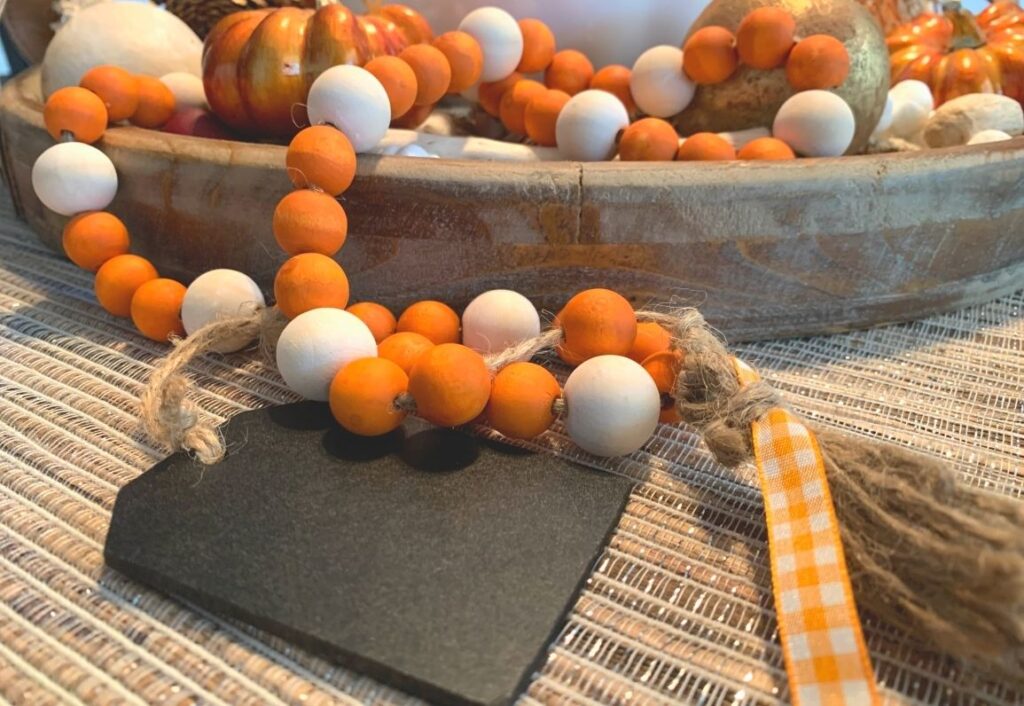
What I love about the garland is that it is so easy to make and you can create a different one for every holiday.
This Thanksgiving bead garland has a little chalkboard cut out on the end of it. You can write a message of gratitude on it for family and friends.
Available on Amazon
If you are not a DIY’er you can purchase wood bead garland at Hobby Lobby, Target, or even Amazon. Their prices on the natural wood garland is about the same as making it yourself. The garland in the picture below is $9 on Amazon.
However if you want to paint the bead garland you’ll need to purchase a package of beads separately and string them yourself since the beads are too close together to paint.
I recommend making several different garlands and mixing the natural wooden garland with painted garland for a beautiful farmhouse look.
The post
Wood Bead Garland appeared first on The Happy Housewife™ :: Home Management.Related Stories
from The Happy Housewife (Full Feed) https://ift.tt/364X8dm
No comments:
Post a Comment